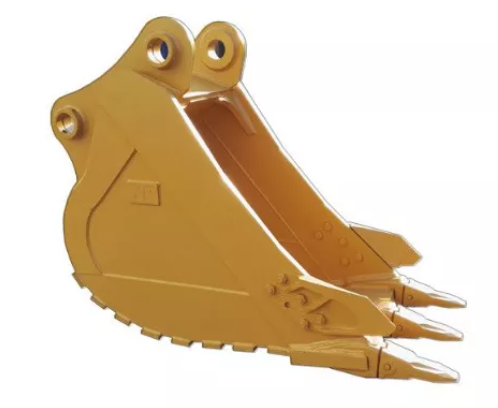
Is your Excavator Bucket slowing down your job? Excavator bucket changes may seem straightforward at first glance, but in practice, improper handling can lead to significant downtime, equipment damage, or even safety hazards. Even a small delay caused by a misaligned pin or incompatible attachment can escalate into costly operational setbacks. This guide provides a step-by-step, safe, and efficient procedure to help operators perform bucket changes with minimal risk. You will learn the essential steps, the necessary tools, and the critical checks required to ensure a smooth, reliable, and safe bucket swap, whether in construction, landscaping, or demolition projects.
Understanding Your Excavator Bucket Connection System
Changing an excavator bucket is not just about swapping one attachment for another; it starts with a thorough understanding of the machine's connection system. Operators must identify whether the bucket uses a pin-on system or a quick coupler, and confirm compatibility before attempting removal. Failure to understand the connection type can result in misalignment, pin damage, or unsafe installation. Spending time on this preparatory step prevents downstream problems, reduces wear on components, and ensures the bucket performs optimally once installed. Careful inspection and knowledge of the system make the entire change process smoother and more predictable.
Pin-On vs Quick Coupler
Pin-on systems rely on two main pins secured with lynch pins, offering a robust and durable connection suited for heavy-duty work. Quick couplers, in contrast, use either a latch or a hydraulic locking system, significantly reducing the time required for bucket swaps. While pin-on systems provide long-term strength and reliability, quick couplers allow for rapid attachment changes, which is especially useful in projects requiring multiple bucket types. Choosing the right system depends on operational priorities—durability versus speed—and understanding these differences ensures the operator selects the correct attachment for the task at hand.
Identifying Pin Sizes and Ear Widths
Every excavator model has specific pin diameters and ear widths. These dimensions can vary even between machines of the same tonnage class. Mismatched pins or incorrect ear spacing can cause loose fits, misalignment, or premature wear of bushings and linkage components. Before beginning a bucket change, always measure pins and ear widths carefully, and verify that replacement buckets meet these specifications. Correct sizing prevents unnecessary mechanical stress, extends the life of the bucket, and ensures precise, safe operation during excavation tasks.
Hydraulic vs Non-Hydraulic Attachments
Some excavator attachments, such as hydraulic thumbs, grapples, or tilt buckets, involve hoses and pressure lines that must be safely disconnected before bucket removal. Operators should release hydraulic pressure fully to avoid sudden movements or fluid spray, which can be dangerous. Non-hydraulic attachments simplify the removal process but still require attention to pin alignment and secure handling. Understanding whether your attachment uses hydraulic components allows you to plan the change procedure effectively, ensuring safety and preventing damage to both the machine and the attachment.
Common Compatibility Issues
Excavator buckets are not universally interchangeable. Different OEMs (Original Equipment Manufacturers) may use varying pin centers, ear widths, and attachment angles. A bucket designed for one brand may not fit another, even if the machines appear similar. Operators must cross-check part numbers, specifications, and manufacturer guidelines before attempting installation. Awareness of these compatibility issues reduces the risk of forced fitting, which can damage pins, ears, or hydraulic connections, ultimately protecting both equipment investment and operator safety.
When a Bucket Is Unsafe
Buckets showing visible signs of wear or damage—such as cracks, loose teeth, bent ears, or elongated pin holes—should never be installed without proper inspection. Even if a worn bushing allows the bucket to mount, it can create excessive movement under load, increasing the risk of failure. Regularly inspecting pins, bushings, and structural components ensures operators only work with safe, fully functional equipment. Safety should always take precedence over convenience, as using a compromised bucket can result in serious injury or costly machine repairs.
Safety Protocols Before Changing an Excavator Bucket
Safety is paramount when handling an excavator bucket, which can weigh several hundred kilograms. Improper positioning, failure to lock hydraulics, or neglecting PPE protocols can quickly turn a routine change into a dangerous situation. Operators must follow established safety measures at every step to protect themselves and the equipment. Implementing these protocols consistently prevents accidents, reduces downtime, and maintains operational efficiency on the jobsite.
Stabilizing the Machine
Ensure the excavator is parked on firm, level ground before starting any work. Lower the boom so the bucket rests lightly on the ground, relieving pressure on the pins. This stabilization step prevents unexpected bucket movement, which could otherwise cause injury or misalignment during the removal process. Taking a few extra moments to position the machine properly contributes to both operator safety and the longevity of the attachment system.
Locking Out Hydraulics
Deactivate the engine, remove the key, and engage any hydraulic locks to prevent unintended movement. Locking out the hydraulics ensures that the boom, stick, or bucket cannot move under residual pressure, reducing the risk of sudden pinching or crushing incidents. Following these steps is especially critical when working with hydraulic attachments, as pressure buildup can lead to hazardous oil spray or component failure.
PPE and Pinch-Point Awareness
Operators should wear gloves, goggles, and other necessary personal protective equipment. Avoid standing beneath the linkage or near potential pinch points, and always keep fingers and hands clear of pin holes. Awareness of high-risk zones during a bucket change minimizes the chance of injury, reinforces safe work habits, and ensures that each step of the removal and installation process is carried out with maximum safety.

How to Remove an Excavator Bucket (Step-by-Step)
Removing an excavator bucket requires a careful and methodical approach to prevent equipment damage and ensure a smooth reinstallation process. Each step should be followed in sequence to minimize stress on the pins, bushings, and linkage components. Proper removal not only protects the machine but also sets the stage for a safe and efficient installation of the replacement bucket. Operators must focus on controlled handling, regular inspection, and the correct use of tools throughout the process. Paying attention to detail at every stage reduces the risk of misalignment and prolongs the life of both the bucket and the excavator.
Lower and Position the Bucket
Begin by placing the bucket flat on stable, level ground. Keeping light pressure on the bucket helps relieve tension on the pins and prevents them from binding. Avoid lifting the bucket too high, as this can make pin removal more difficult and increase the risk of misalignment or damage to the linkage. Proper positioning ensures that the pins can slide out smoothly and reduces the likelihood of forcing components, which can lead to costly repairs. Taking the time to set the bucket correctly at this stage is crucial for a safe and efficient removal.
Remove Lynch Pins and Safety Locks
Next, remove the lynch pins and retaining clips carefully using a screwdriver. Store all small components in a clean area to prevent dirt, debris, or contamination, which could compromise their functionality during reinstallation. Proper handling of these components ensures they remain in good condition and allows for secure reattachment later. This step also gives the operator the opportunity to inspect the pins and locks for wear or damage, which, if present, should be addressed before installing a new bucket to maintain safety and performance.
Slide Out the Main Pins
After the lynch pins are removed, gently tap out the main pins using a drift pin and hammer, applying penetrating oil if necessary to loosen stuck components. Avoid striking too forcefully, as excessive impact can damage the bushings, ear plates, or other linkage components. The removal process should be controlled and deliberate, allowing pins to come out smoothly without causing undue stress on the surrounding parts. Proper technique here helps maintain the integrity of both the bucket and the excavator linkage, preventing costly repairs and ensuring a proper fit for the replacement bucket.
Detach the Dipper and Link Assembly
Once the pins are removed, slightly curl the stick and carefully move the boom away to separate the bucket from the linkage. Place the old bucket on sturdy blocks to prevent it from tipping or rolling, ensuring it remains stable and secure. Following this method reduces the chance of accidental drops, hydraulic strain, or equipment damage. Attention to detail during this step protects the operator and the machine, and prepares the workspace for a smooth transition to installing the new bucket.
Preparing the New Excavator Bucket for Installation
A new bucket should be thoroughly cleaned, inspected, and properly prepared before installation. Pre-installation preparation ensures that the bucket installs quickly, fits correctly, and operates efficiently without excessive wear. Spending time on this step prevents alignment issues, reduces stress on pins and bushings, and extends the bucket’s operational life. Operators should follow a systematic inspection and lubrication routine to maximize performance and safety.
Inspect Pin Holes and Bushings
Before installation, examine the pin holes and bushings for debris, rust, scratches, or other damage. Clean and smooth surfaces facilitate proper pin insertion, ensuring tight, secure connections. This attention to detail is critical for minimizing play under load, preventing movement that could damage the linkage, and maintaining overall operational safety. A careful inspection at this stage also allows operators to identify any parts that need replacement before they compromise performance.
Check Cutting Edges and Teeth
Inspect the cutting edges and teeth to ensure they are securely fastened. Loose teeth can become dangerous projectiles during operation, while worn or damaged edges reduce digging efficiency and increase stress on the bucket. Confirming that all bolts and pins are tight before installation guarantees safe operation and optimal performance. Well-maintained teeth and edges improve productivity, reduce fuel consumption, and ensure the excavator performs at its best under heavy loads.
Grease Everything
Apply a light coat of grease to all pins, bushings, and contact surfaces. Proper lubrication reduces insertion resistance, helps achieve precise alignment during installation, and protects moving parts from premature wear. Greasing also prevents corrosion and extends the life of both the bucket and the linkage. This step not only facilitates a smoother installation process but also contributes to long-term durability and reliable performance on the jobsite.
Conclusion
Changing an Excavator Bucket is straightforward when the proper procedure is followed. Operators should prioritize safety, alignment, and pin security to ensure optimal performance. Using a high-quality YF Bucket protects the machine, enhances digging efficiency, and reduces long-term wear. Regular inspections, proper maintenance, and consistent greasing of the Excavator Bucket help extend its service life, minimize downtime, and keep projects running smoothly. Choosing YF Bucket guarantees durability, precise fit, and reliable operation across all construction tasks.
FAQ
Q: How do I start an Excavator Bucket change procedure safely?
A: Begin by placing the Excavator Bucket on level ground and locking the hydraulics before removing any pins.
Q: What tools are needed for an excavator bucket change procedure?
A: You need a drift pin, hammer, and grease to align and secure the Excavator Bucket.
Q: Why won't my Excavator Bucket pins slide out?
A: Misalignment or pressure on the linkage can jam the Excavator Bucket pins during the change procedure.


